

Adding audio and video to your website
Before adding an audio or video tag to a website, you need to know about these key features. This will enhance the beauty of your site!


Introduction
HTML is a language made up of elements, which can be applied to pieces of text to give them different meanings in a document. Structure a document into logical sections, and embed content such as images and videos into a page. This is something brief about HTML.
We all know about the procedure of adding an image tag in HTML. Let's move to the most comfortable way of adding audio and video to your website through the
<audio>and<video>tags.
The <audio> tag.
An <audio> tag is used to embed some sound content in an HTML document. This audio file can contain mp3 files, Songs, etc. The <audio> tag may contain one or more audio sources, represented using the src attribute. Also can be represented through the <source> element. The browser will choose the most suitable one of those two.
In a similar manner to the <img> element, we can include a path to the media we want to embed inside the src attribute. Including this attribute, some other attributes are there. Then they are:
Attributes of <audio> tag..!
autoplay:- This is a Boolean attribute. If this attribute is specified, then audio will automatically begin playback when a page is loaded. But documents say using autoplay attribute may unpleasant experience for the user.controls:- If you use this attribute, then the browser will offer controls to allow the user to control audio playback, including volume, seeking, and pause/resume playback.controlslist:- This attribute helps the browser select what controls to show for the audio element. The allowed values arenodownload,nofullscreen, andnoremoteplayback.loop:- A Boolean attribute, the audio player will automatically seek back to the start upon reaching the end of the audio if specified.muted:- A Boolean attribute that indicates whether the audio will be initially silenced. Its default value is false.src:- The URL of the audio to embed. Instead, we can also use the<source>tag to specify audio embed.
Example for <audio> tag..!
<!DOCTYPE html>
<html lang="en">
<head>
<meta charset="UTF-8">
<meta http-equiv="X-UA-Compatible" content="IE=edge">
<meta name="viewport" content="width=device-width, initial-scale=1.0">
<style>
body{
background-color: #808080;
}
.container{
background-color: rgb(28, 43, 86);
display: flex;
flex-direction: column;
align-items: center;
justify-content: center;
margin: 10%;
border: 2px solid #827db0;
}
.container h1, h3{
color: #ffffff;
}
</style>
<title>Audio Tut</title>
</head>
<body>
<div class="container">
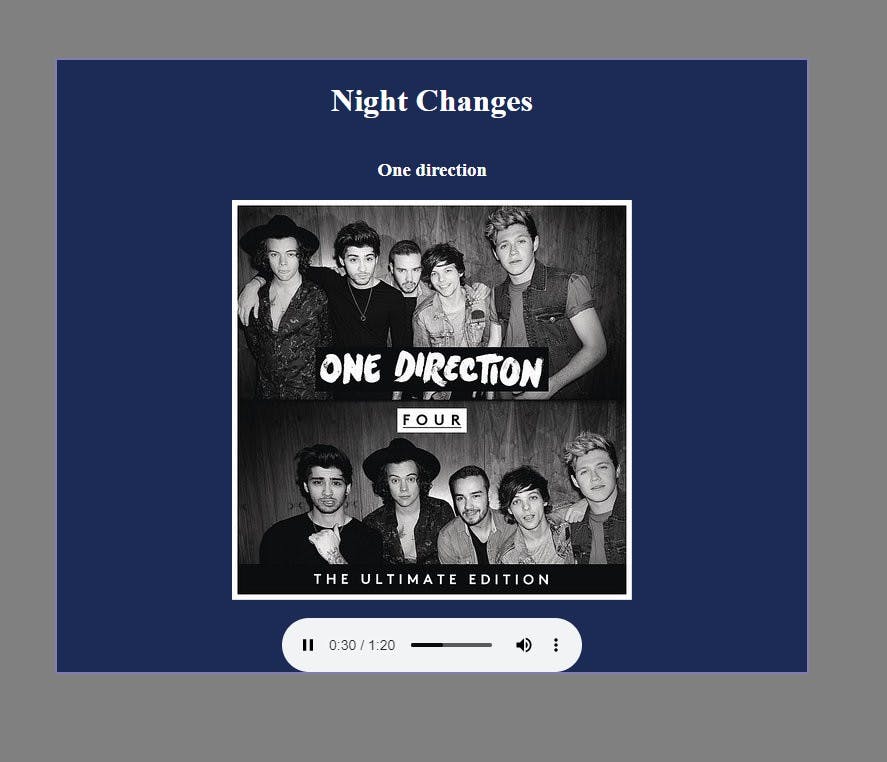
<h1>Night Changes</h1>
<h3>One direction</h3>
<img src="./Asset/size_l.jpg" alt="Night Changes"><br>
<audio src="./Asset/Night-Changes_320(PagalWorld)-[AudioTrimmer.com].mp3" controls></audio>
</div>
</body>
</html>
Output:-
The <video> tag.
A <video> tag is used to embed a media player which supports video playback into the HTML document. In a similar manner to the <img> tag, we include a path to the media we want to display inside the src attribute. Also, we can include other attributes such as video width, Height, autoplay, and loop. Which are similar to the <audio> tag.
Attributes of <video> tag..!
autoplay:- This is a Boolean attribute. If this attribute is specified, then audio will automatically begin playback when a page is loaded. But documents say using autoplay attribute may unpleasant experience for the user.autopictureinpicture:- A Boolean attribute which if true indicates that the element should automatically toggle picture-in-picture mode when the user switches back and forth between this document and another document or application.controls:- If you use this attribute, then the browser will offer controls to allow the user to control video playback, including volume, seeking, and pause/resume playback.controlslist:- This attribute helps the browser select what controls to show for the video element. The allowed values arenodownload,nofullscreen, andnoremoteplayback.height:- It sets the height of the video display.loop:- A Boolean attribute; if specified, the browser will automatically seek back to the start upon reaching the end of the video.muted:- A Boolean attribute that indicates whether the audio contained in the video will be initially silenced. Its default value is false.playsinline:- This is a Boolean attribute that indicates that the video is to be played inline, which is within the element's playback area.preload:- This enumerated attribute is intended to provide a hint to the browser about what the author thinks will lead to the best user experience regarding what content is loaded before the video is played.src:- The URL of the video to embed. Instead, we can also use the<source>tag to specify video embed.width:- It sets the width of the video display.
Example for <video> tag..!
<!DOCTYPE html>
<html lang="en">
<head>
    <meta charset="UTF-8">
    <meta http-equiv="X-UA-Compatible" content="IE=edge">
    <meta name="viewport" content="width=device-width, initial-scale=1.0">
    <style>
        body{
            background-color: #ffffff;
        }
        .container{
            background-color: rgba(229, 236, 127, 0.558);
            display: flex;
            flex-direction: column;
            align-items: center;
            justify-content: center;
            margin: 10%;
            border: 2px solid #827db0;
        }
        h1{
            color: #131010;
            text-decoration: underline dotted;
        }
        video{
            margin: 15px;
        }
    </style>
    <title>Video Tut</title>
</head>
<body>
    <div class="container">
        <h1>Tech Demo</h1>
        <video src="./Asset/video.mp4" controls muted height="300vh"></video>
    </div>
</body>
</html>
Output:-

I think this information is helpful to you all..!
Thank you for reading (learn to start)